SEHUN
OH
DESIGN
OPEN KITE (2015)
: open source collapsible tetrahedral kite
featured projects
© Sehun Oh
All rights reserved
본 프로젝트는 Design for Play라는 주제로 시작되었다. 디자인 방향 구상을 위해 사전 조사를 진행하던 중, 영국의 아티스트 듀오 Heather & Ivan Morrison이 사면체 구조를 반복시켜 만든 거대한 큐브 형태의 하늘을 나는 조각작품인 Little Shining Man (2011)을 알게 되었고, 도무지 날 수 있을 것처럼 보이지 않는 기하학적 구조물이 공중에 떠서 보여주는 아름다움에 매료되었다. 사면체 구조의 연은 100여 년 전 Alexander Graham Bell이 비행기를 개발하려던 과정에서 처음 발명하였는데 (Frost King, 1904) 인터넷상에 종이 스트로를 실로 엮고 얇은 종이를 붙여서 개인들이 간단히 만들어볼 수 있는 방법들이 공유되어 있어서 처음에는 그 안내를 따라 직접 만들어보기 시작했다. 사면체 cell의 사이즈와 개수를 바꿔가며 프로토타이핑을 반복하면서, cell의 수가 몇개 되지 않는 작은 연을 만들 때는 큰 어려움이 없었지만 cell 수가 늘어나면 손이 많이 가는 반복작업이 필요하다는 데에 불편함을 느끼게 되어 좀 더 손쉽게 만들 수 있는 방법을 생각해보게 되었다. 또한, 제작 결과물 크기가 커지면 운반이나 보관에도 어려움이 생기게 된다는 점을 확인하였고 그러한 단점들을 개선해 좀 더 사용자의 관점이 고려된 ‘제품’으로서의 사면체 연을 디자인하게 되었다. 이를 위해 파트수를 줄여 제작과정이 좀 더 단순화되도록 3D 프린트할 수 있는 좌우 대칭의 날개 부품을 디자인하였으며, 사용하지 않을 때는 납작하게 펼쳐서 보관 및 운반하고 사용할 때만 입체로 접을 수 있도록 하였다. Open Kite는 누구나 다운로드 받아 프린트하고 제작해 볼 수 있도록 도면 데이터 및 제작방법이 아래에 공개되어 있다.
The project brief was about designing a product for play. While I was trying to explore the world of play, I was fascinated by Little Shining Man (Heather & Ivan Morrison, 2011), a huge cube shape kite which consists of hundreds of tetrahedral cells. Originally, Alexander Graham Bell invented this type of kite as a form of airplane about a hundred year ago (Frost King, 1904) and Heather & Ivan Morrison translated Bell's invention into a flying sculpture. I decided to explore this intriguing architectural structure. When I tried to build my early versions of prototypes according to the instructions on the internet, I realised that building tetrahedral kites with drinking straws and tissue papers is quite labour intensive especially when I made it in bigger scale with many cells. So, I tried to simplify the building process and designed several types of 3d printable components with various detail shapes and sizes to test the strength of the structure and also to check the flying ability according to the weight to area ratio. I kept repeating the make-test-improve process each time to understand the relationships among structure strength, weight, size and flying ability so that I could optimise the design. I also tested existing kite products such as a box shape kite and a power kite which can be controlled by 4 lines to understand the virtue of current kiting products. I also optimized the component shapes to make the design more suitable for personal desktop 3d printers as an open source project. I tried to simplify making process by designing specific components. Collapsibility is another major factor that makes it accessible by people because people can make it flat when they store or transport it. People can download the component data for free from my homepage, 3d print them and build their own kite as explained below.
오픈카이트 제작 방법
HOW TO BUILD YOUR OPEN KITE
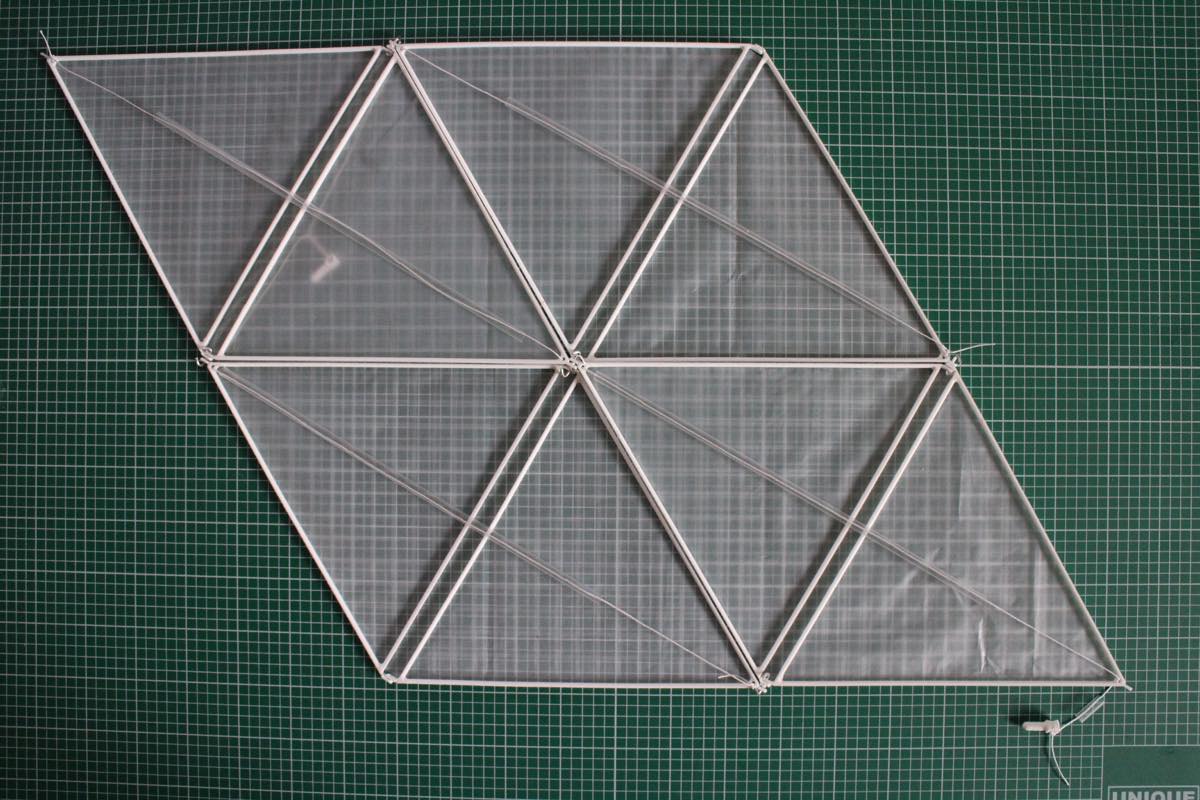
재료 준비 (사면체 4개로 구성된 연)
Material Preparation (4 cell kite)
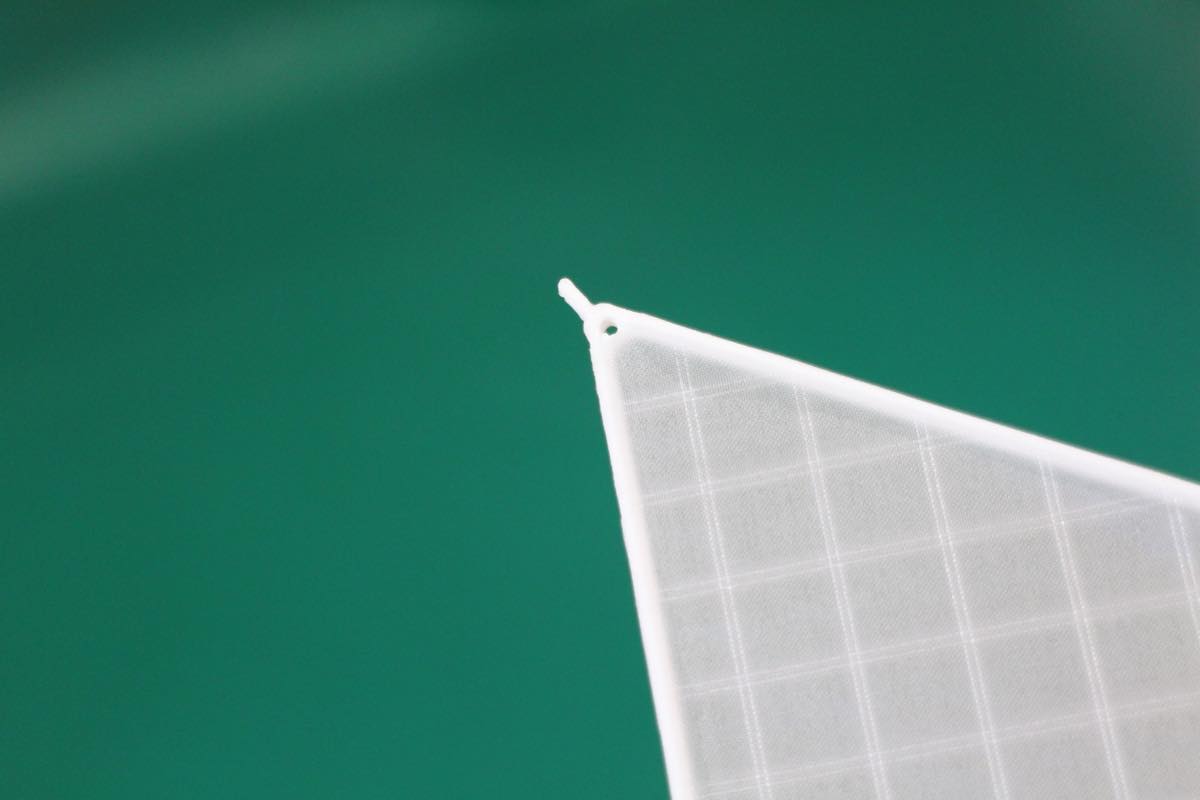
<3D 프린팅> 날개 부품 4쌍, 간격 메움 링 4개, 고정 플러그 2개. (오른쪽 링크에서 프린트용 STL 파일을 다운로드 받으실 수 있습니다.)
<기타 재료> 빨대 5개 (직경 4mm, 길이 160~200mm), 가벼운 립스탑 천 혹은 얇은 비닐, 낚시줄, 알루미늄 재질의 블라인드 리벳 핀 8개 (리벳 직경 기준으로 2.4mm를 구입하시면 안쪽 알루미늄 핀 직경이 1.2mm정도 됩니다) 혹은 알루미늄 철사, 순간 접착제 (점도 낮은 것), 화훼용 철사(꽃철사).
<도구> 롱노우즈 플라이어, 니퍼, 커터.
3D Printing : 4 pairs of Wing components, 4 gap filler Rings, 2 quick tying Plugs. (You can download the STL files for 3d printing from the link on the right side)
Other materials : 5 drinking straws (4mm diameter, 160~200mm length), Light rip-stop nylon fabric (or thin plastic film), Fishing line (or similar thread), Blind rivet pins (2.4mm diameter rivet usually has 1.2mm diameter pins) or stiff aluminium wire, Thin super glue, Bindig wire for floristry.
Tools : Long nose plier, Nipper, Cutter.
DOWNLOAD
from THINGIVERSE
STEP 1
위의 링크를 통해 openkite.zip 파일을 다운로드 받아 압축을 풀고 날개 4쌍, 간격 메움 링 4개, 고정 플러그 2개씩을 3D 프린트한다. FDM 방식의 프린터를 사용할 경우 재료로 PLA보다는 ABS를 사용하는 것이 연으로 만들어진 후 외부 충격에 부서지지 않고 더 잘 견디는 특징을 보였다. 그리고 필자의 경우 FDM 방식의 프린터에서 날개 부품을 세워서 프린트할 경우 레이어간의 접착력이 부족해 쉽게 파손되었기 때문에 눕혀서 한 번에 한 쌍씩 만 프린트했다.
Download openkite.zip file, unzip it for the Wing, the Ring and the Plug STL files and 3D print them. ABS material is recommended than PLA because it is less brittle according to my experience. I haven't succeeded in printing more than a pair at once for the Wing component, because it was not strong enough when it is printed vertically. If you find some better ways, please let me know.
STEP 2
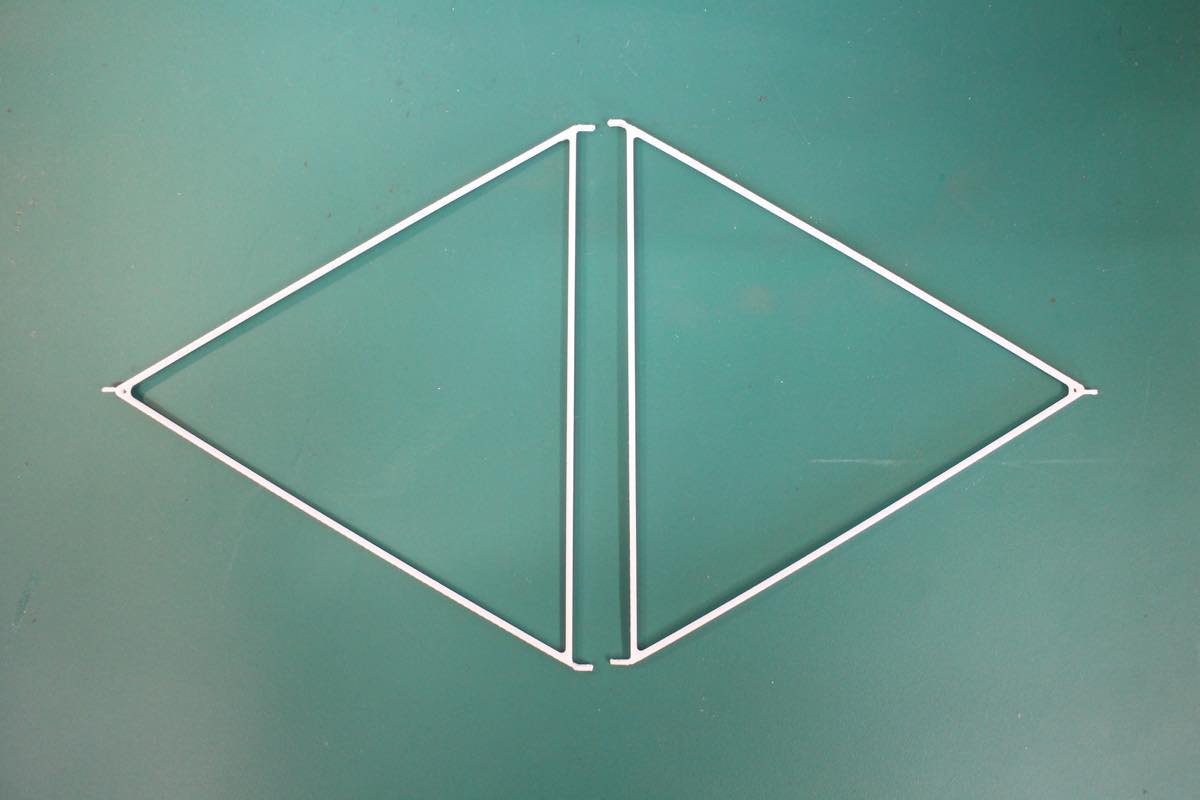
같은 부품이 왼쪽과 오른쪽 날개에 공통적으로 사용되지만 위와 아래 연결부 형상이 조금씩 다르므로 조립방향에 유의해야 한다. 왼쪽 사진에서 오른쪽 날개의 위쪽 연결부가 위로 조금 더 돌출되어 왼쪽 날개 연결부를 위에서 감싸도록 되어있고 아래쪽은 반대로 왼쪽 날개의 연결부가 아래로 약간 더 내려가서 오른쪽 날개 연결부를 감싸도록 되어있다. 사진을 클릭하면 확대해 볼 수 있다.
Left and right side Wing components are the same but you need to be careful with the assembly direction because upper and lower connector shapes of the wing component are slightly different. Beware that the upper connector of the right wing and the lower connector of the left wing reach a bit more outward so that they can cover their counter parts. You can click on the left images to have a closer look.

STEP 3
날개 천 접착을 위해 꽃철사로 양쪽 날개를 임시 고정한다. 사진처럼 오른쪽 날개가 위쪽으로 가도록 고정했다면 다른 날개들을 고정할때도 같은 방향으로 맞추어야 나중에 다른 날개들과 정확하게 조립할 수 있다.
Tie both wings together temporarily with short biding wires before gluing them with fabric. You have to keep consistency for wing component directions for later assembly. So keep putting right wings up if you started so.
STEP 4
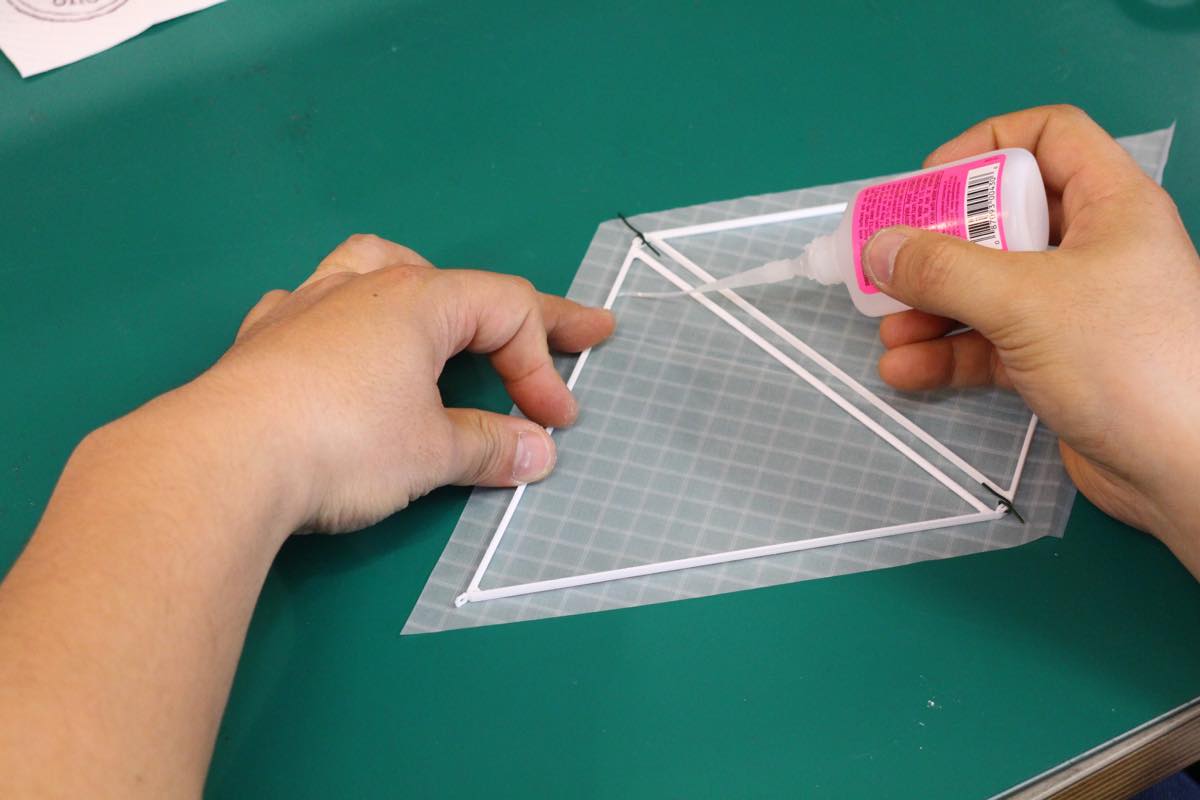
순간접착제를 사용하여 가벼운 천을 양쪽 날개에 붙인다. 사진처럼 ripstop 천을 사용할 수도 있고 구하기 쉬운 얇은 비닐을 사용할 수도 있다. 순간접착제는 최대한 점도가 낮은 것이 작업하기 좋으며, 너무 많이 사용해서 양쪽 날개가 서로 붙어버리지 않도록 주의한다.
Glue the tied wings with a piece of light fabric or thin film. Be careful not to use super glue too much, otherwise the 2 wing components will stick together. The thiner the better for the super glue.
STEP 5
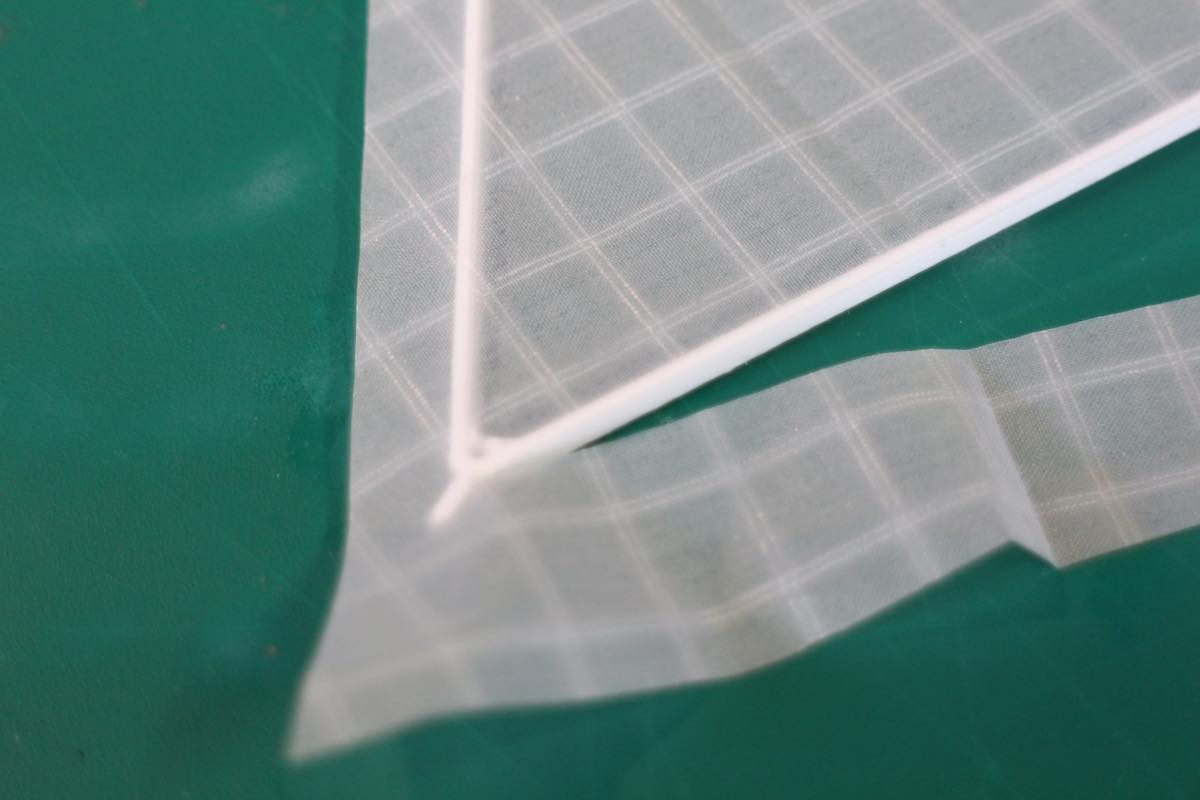
부착된 천을 위쪽으로 향하도록 하여 테두리를 잘라낸다. 천을 아래쪽으로 해서 자르면 아직 덜 굳은 접착제가 바닥쪽으로 스며들어 작업이 어려워질 수 있다.
Cut the glued fabric from the fabric side to prevent the un-dried glue from permeating down to the table and hindering the making process.
모서리쪽은 천을 약간 안쪽으로 잘라야 나중에 날개가 접힐때 방해가 되지 않고(오른쪽 그림), 낚시줄이 통과할 구멍도 막지 않는다(왼쪽 그림).
Fabric needs to be cut inside at the corner not to prevent the wing folding(right fig) and the fishing line penetration(left fig).
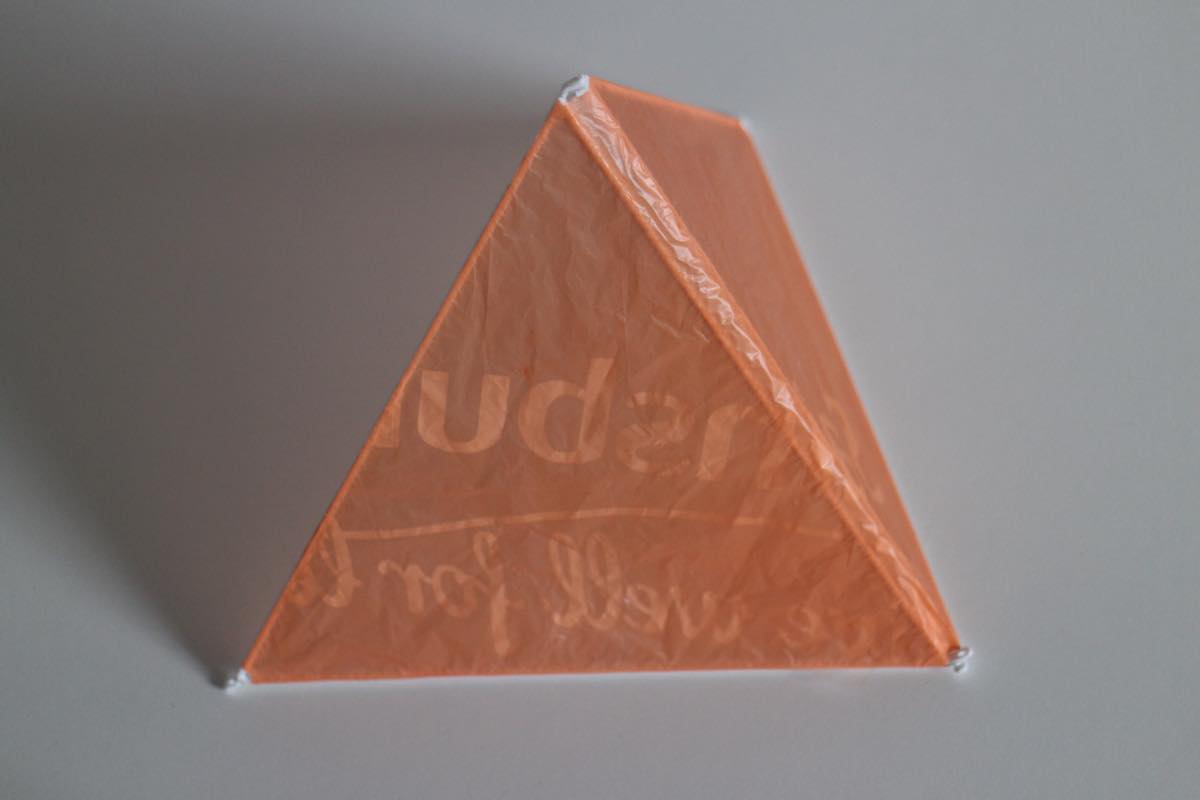
우리 주변에서 흔히 볼 수 있는 비닐봉투를 천 대신 사용할 수도 있다.
Even plastic bags can be used instead of the ripstop fabric.
STEP 6
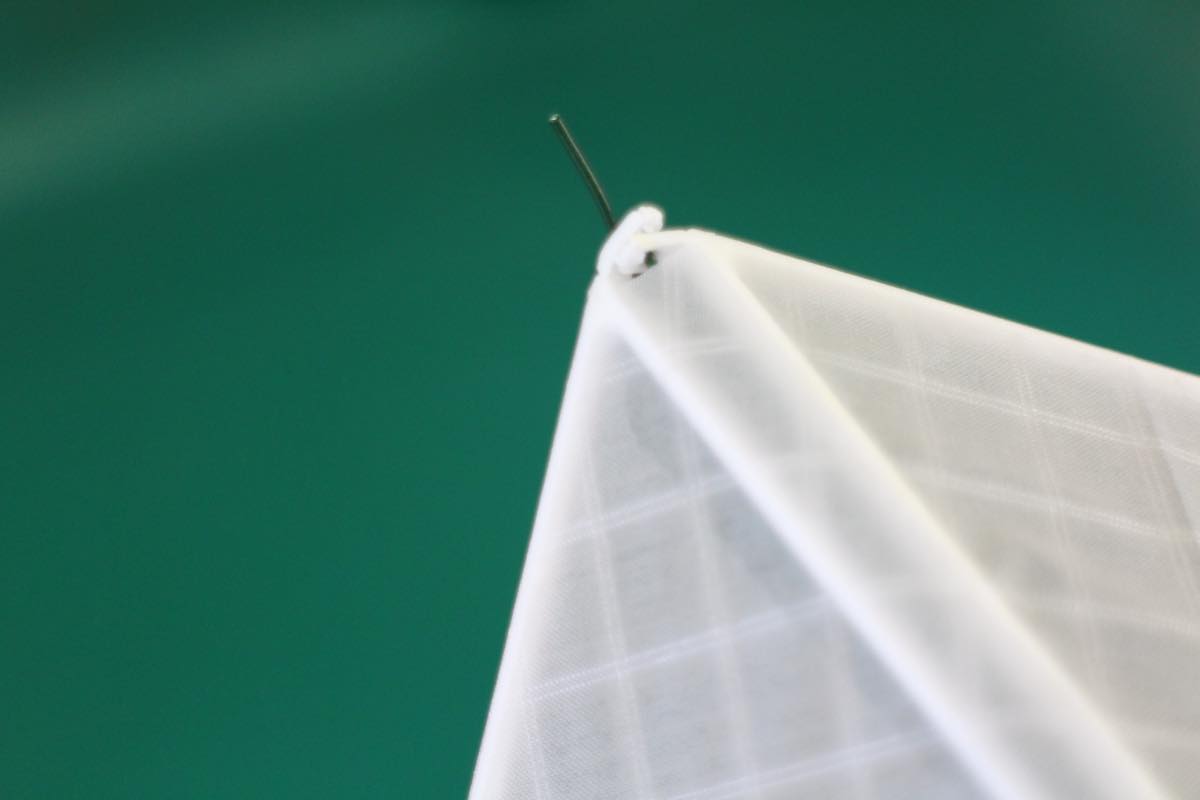
알루미늄 철사를 사진처럼 자른 후 끝을 구부려서 양쪽 날개의 회전축 겸 아래 위 2쌍의 날개를 연결하는 연결고리로 사용한다.
Connect 2 cells vertically. Cut aluminium wire into short pieces and bend both ends to use as folding shafts.


날개 2쌍을 아래 위 방향으로 연결할때 회전축 철사가 여섯겹의 연결 구멍을 관통하도록 조립해야 사면체 날개들 사이의 간격이 바르게 유지되므로 필요한 경우 간격 메움 링을 사용한다. 이번 경우에는 중간에 간격 메움 링 2겹을 추가하여 여섯겹을 만든다. 축을 관통시킨 후 철사 끝을 구부려 마감한다.
Complete connection should be made of 6 layers of shaft holes to keep the right distance between tetrahedral cells, so use the gap filler rings if there are gaps in between the necessary cells. In this case, you need to add 2 rings. Hold, bend and trim the other end of the wire with a long nose plier after penetrating the shaft holes.
시중에서 파는 알루미늄 철사는 너무 무른 것이 많기때문에 블라인드 리벳못에서 안쪽 핀만 뽑아서 알루미늄 철사 대신 사용할 수 있다. 그 경우 못 머리가 없는 반대쪽 끝은 간격 메움 링을 끼우고 순간접착제로 고정하면 된다.
Common aluminum wire is too soft, so you can also use blind rivet pins. You can cap and glue the opposite end of the nail head with a gap filler ring.
STEP 7
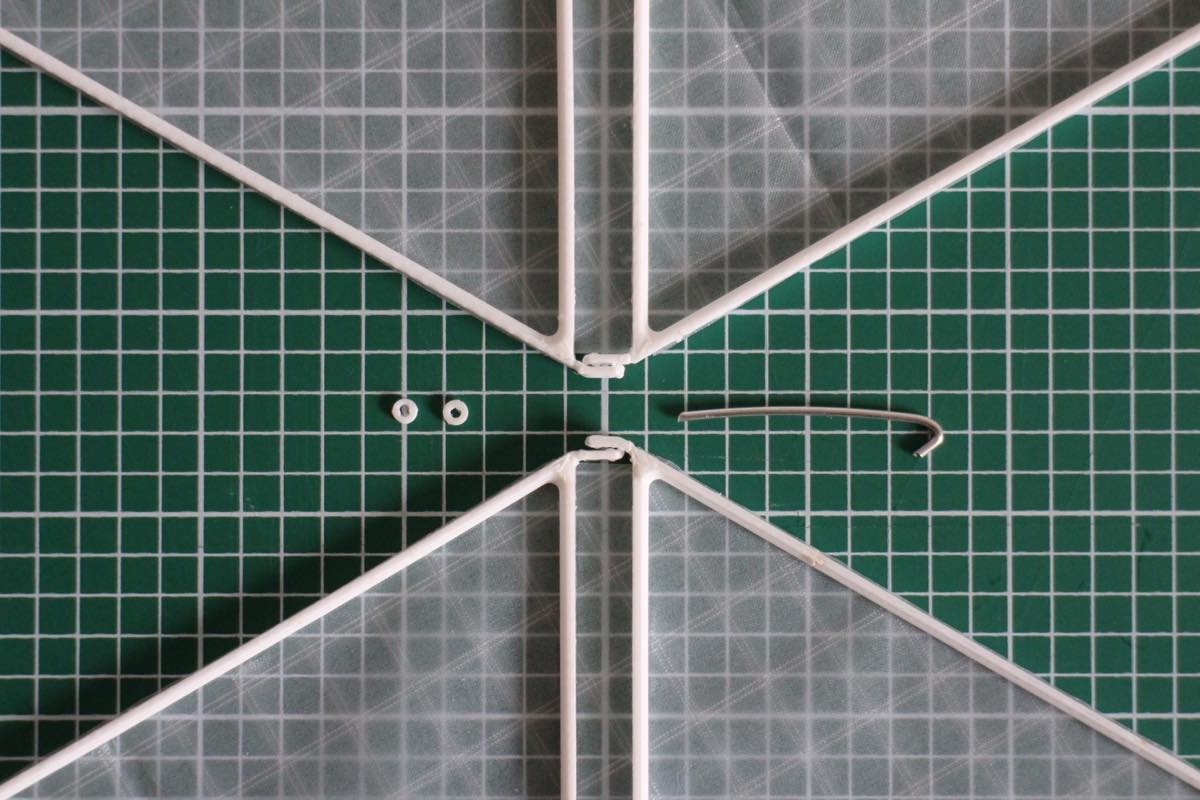
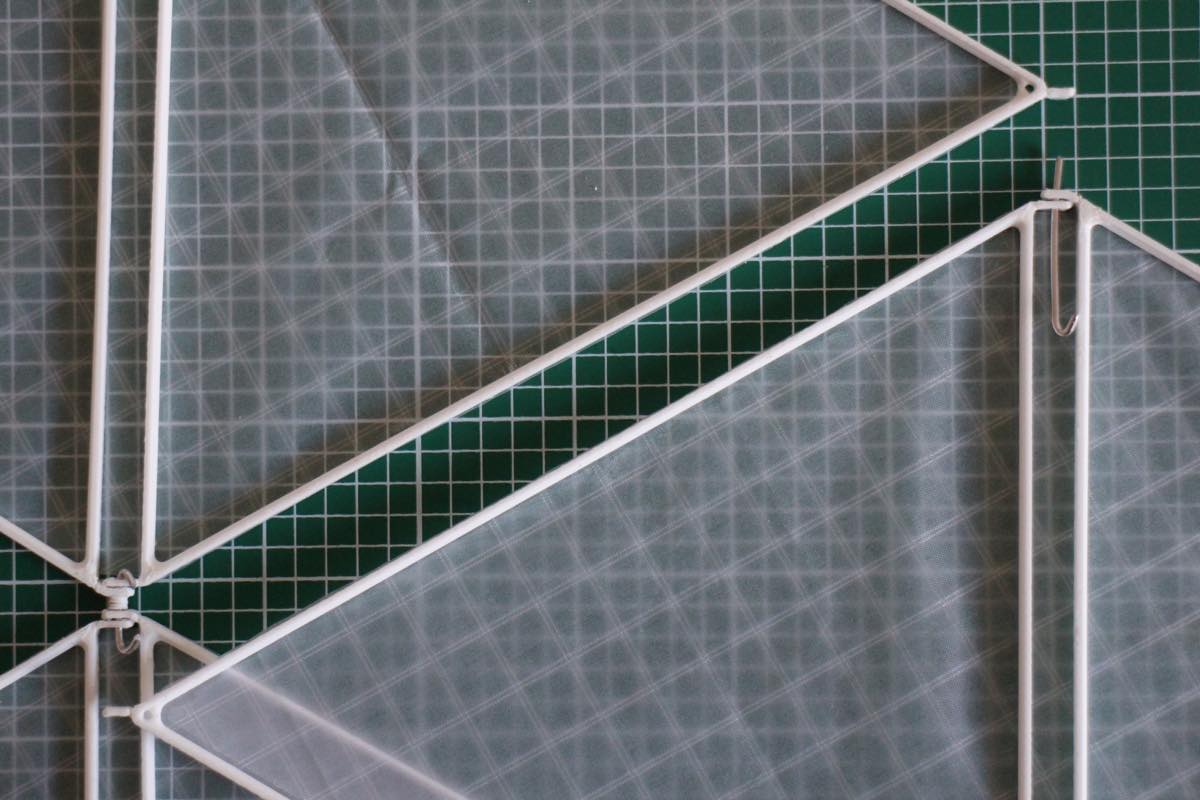
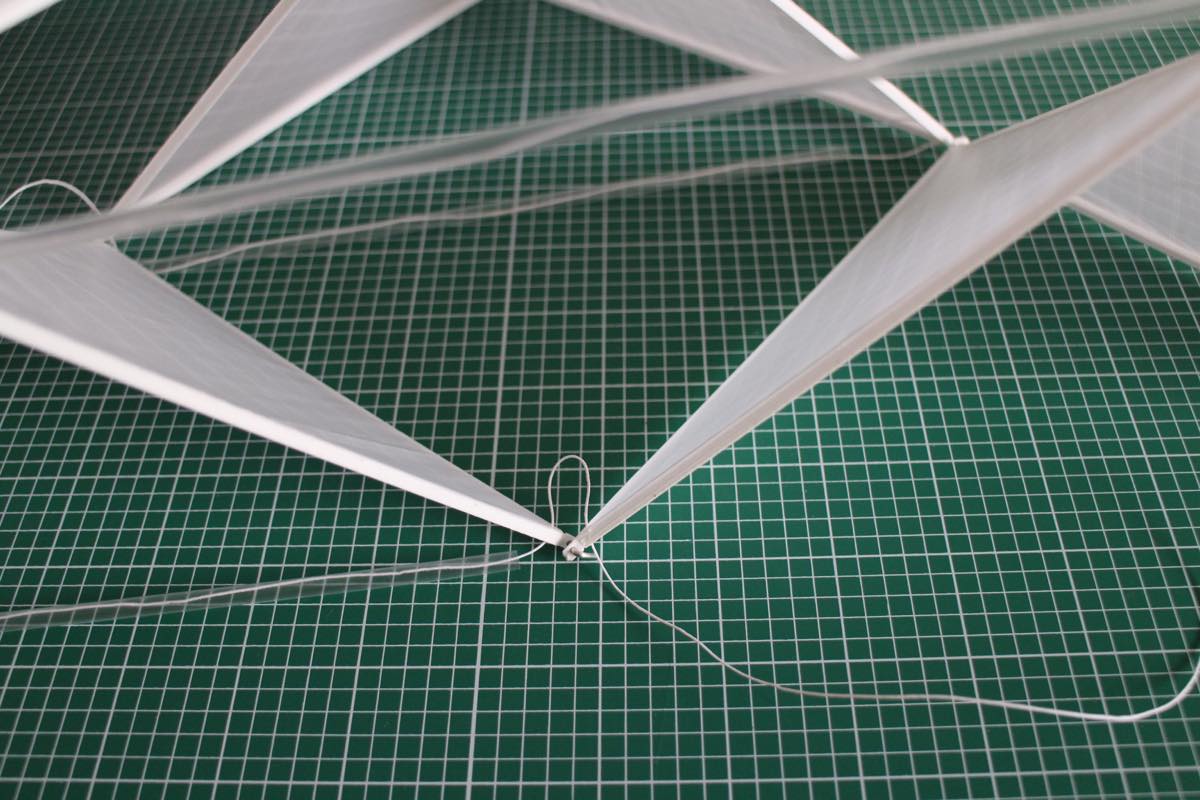
가운데 셀(사면체 날개)들의 날개 끝부분과 우측 셀의 아래 위를 사진처럼 연결한다. 자세히 살펴보면 날개의 오른쪽 끝 연결부는 아래쪽으로 겹치도록 약간 내려와 있고, 반대로 왼쪽 끝 연결부는 위쪽으로 겹치도록 약간 올라가 있음에 유의한다.
Connect right cells' top and bottom with the wing ends of the centre cells. Beware that right ends of wings are slightly lowered and left ends are raised to be assembled in correct positions.

필요한 경우 간격 메움 링을 사용한다. 오른쪽 셀의 경우 위쪽 연결부에는 간격 메움 링이 필요없고 아래쪽 연결부에는 하나가 필요하다. 왼쪽 셀의 경우에는 반대로 위쪽 연결부에만 링 하나가 필요하다.
Use the gap filler rings when they are required. In case of this right cell, you need to use one gap filler ring for bottom connection, and also you need to use one ring for the top connection of the left cell.
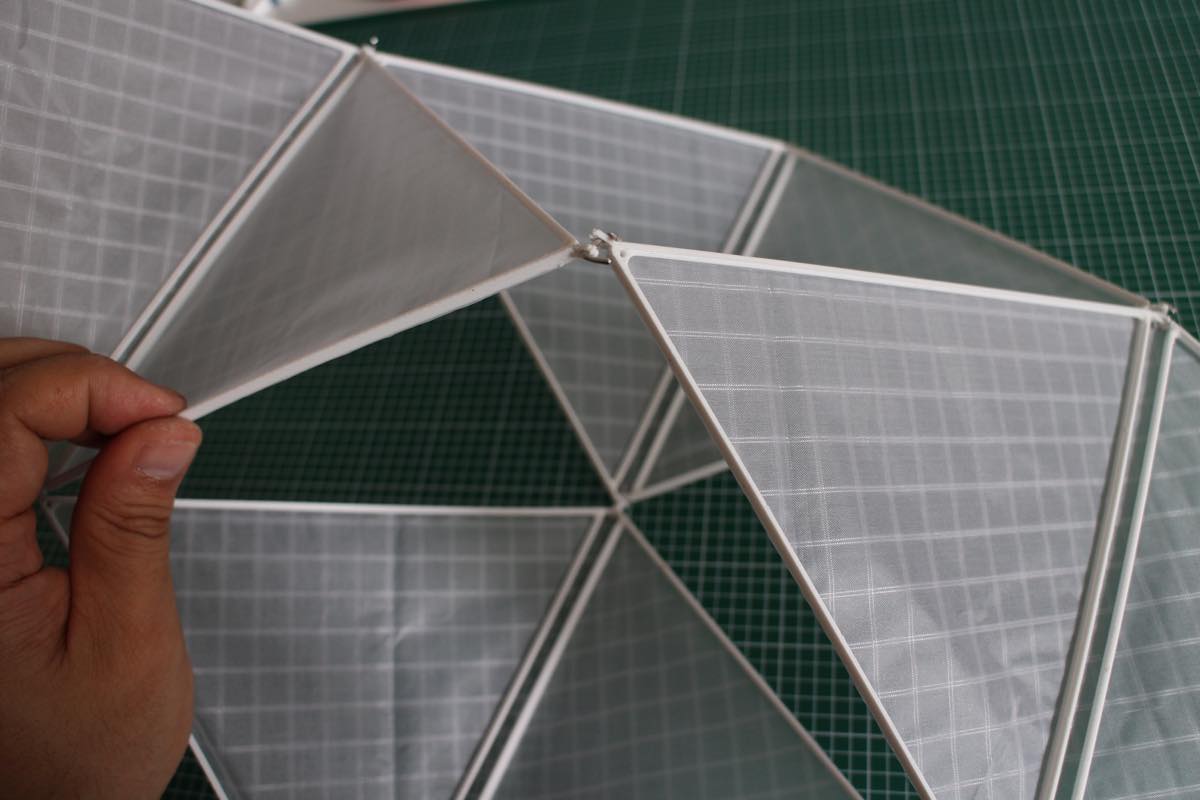
STEP 8
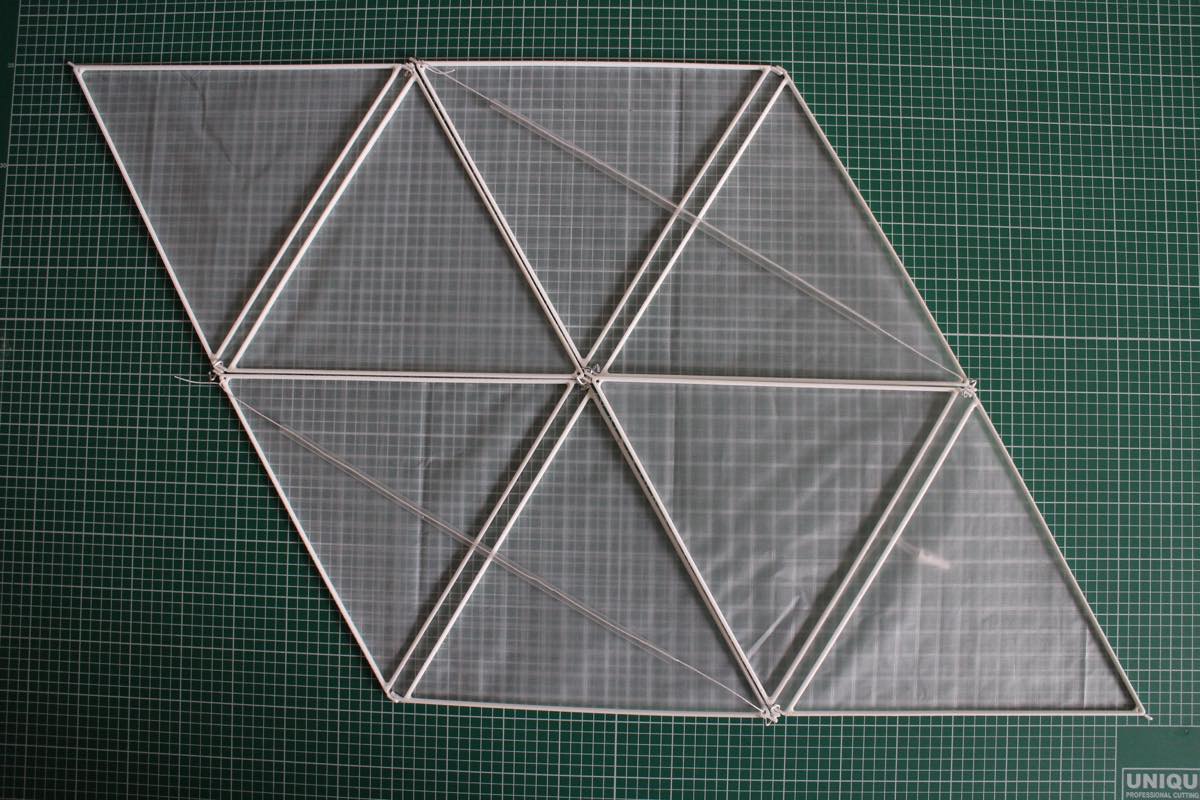
양쪽 셀들의 안쪽 끝을 서로 연결한다. 가운데 셀들의 아래 위 끝부분도 회전축을 박아서 고정한다.
Connect the inward wing ends of the side cells together. Also fix the top and bottom of the centre cells with wire shafts.
STEP 9
다음 단계는 사면체가 입체로 접힐 수 있도록 빨대와 실로 연결하는 것이다. 우선 실을 가운데 셀의 날개 한쪽 끝 구멍에 묶는다.
Next step is making folding structure with thread and straws. At first, tie thread at a wing end hole of a centre cell.
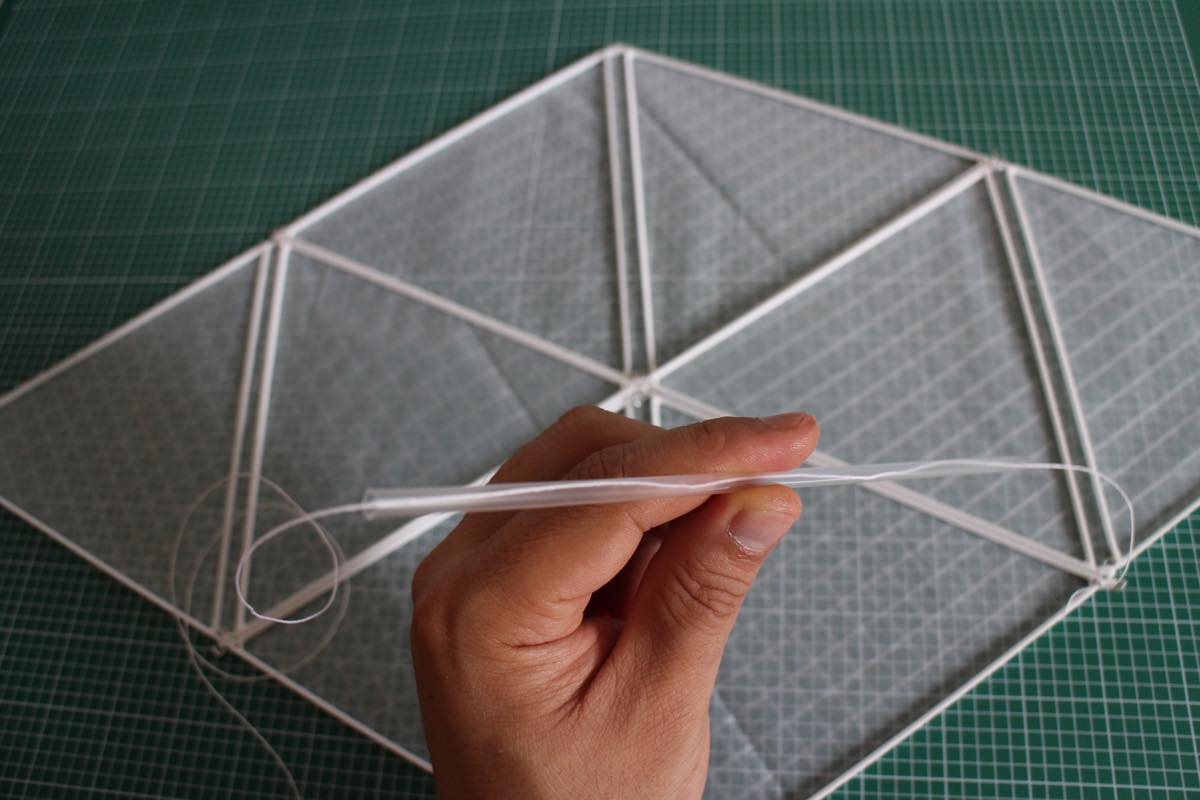
실을 빨대와 날개 다른쪽 구멍에 관통시킨다. 빨대 길이를 조정하여 날개 사이의 각도를 조정할 수 있는데, 예를 들어 160mm 길이의 빨대를 사용하면 정사면체 형태를 만들 수 있고 200mm 길이의 빨대를 사용하면 날개 사이의 각도가 90도가 되어 이 사면체들을 여러개로 확장하면 큐브형태의 연도 만들 수 있다.
Penetrate the thread through a straw and the other wing end hole. You can control wing angles with the straw length. If you use 160mm straws, the cells will be a regular tetrahedron. If you use 200mm straws, the wing angle will be 90 degree and you can make cube kite with many cells.

빨대를 15mm 정도 길이로 잘라 플러그 홀더 2개를 준비한다. 플러그 홀더에 실을 통과시키고 이어서 고정 플러그 구멍도 관통한다.
Cut a straw and make 2 pieces of 15mm length plug holders. Penetrate the thread through the other wing end hole, the plug holder and the plug.
실을 다시 플러그 홀더에 관통시킨 후 또다른 가운데 셀까지 마찬가지 방식으로 실과 빨대를 연결한다.
Penetrate the thread through the plug holder again and keep going for the other centre cell.
구조물을 평평하게 펼친 상태에서 실을 날개 끝 구멍에 묶어 완전히 고정한다.
Unfold the structure and tie the other end of the thread as well.
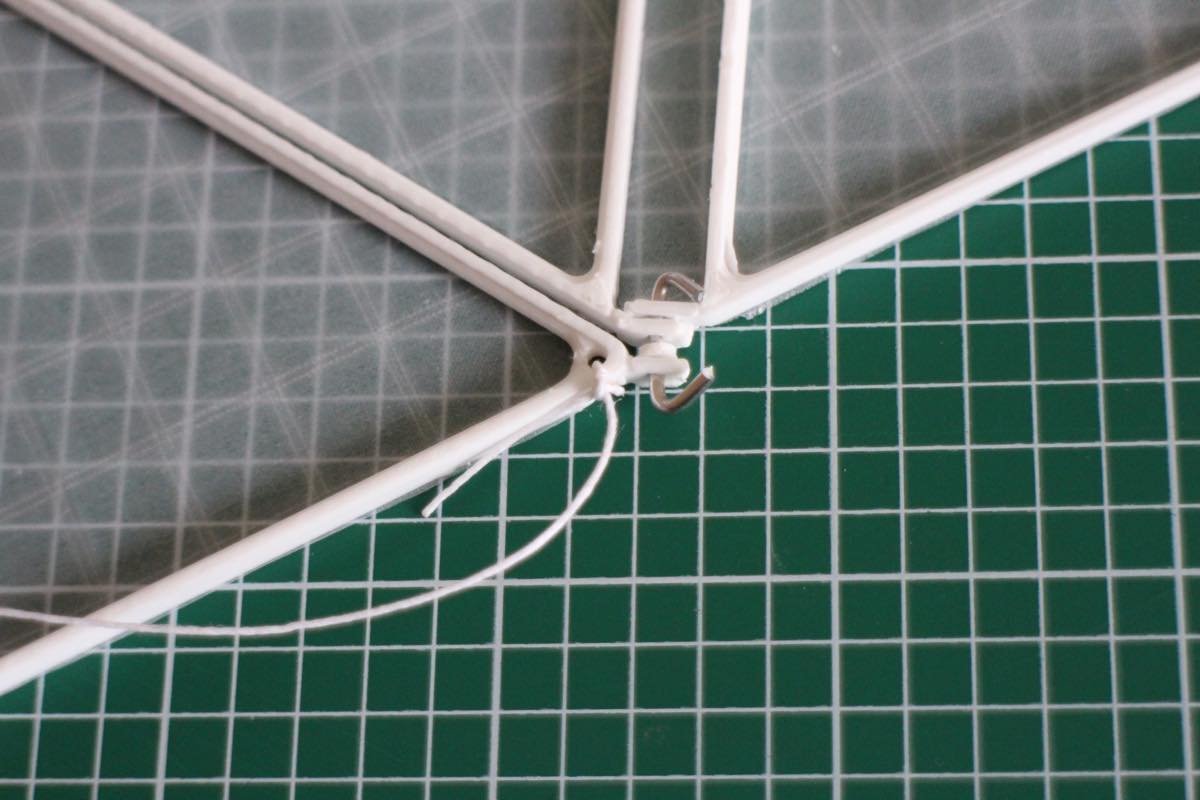
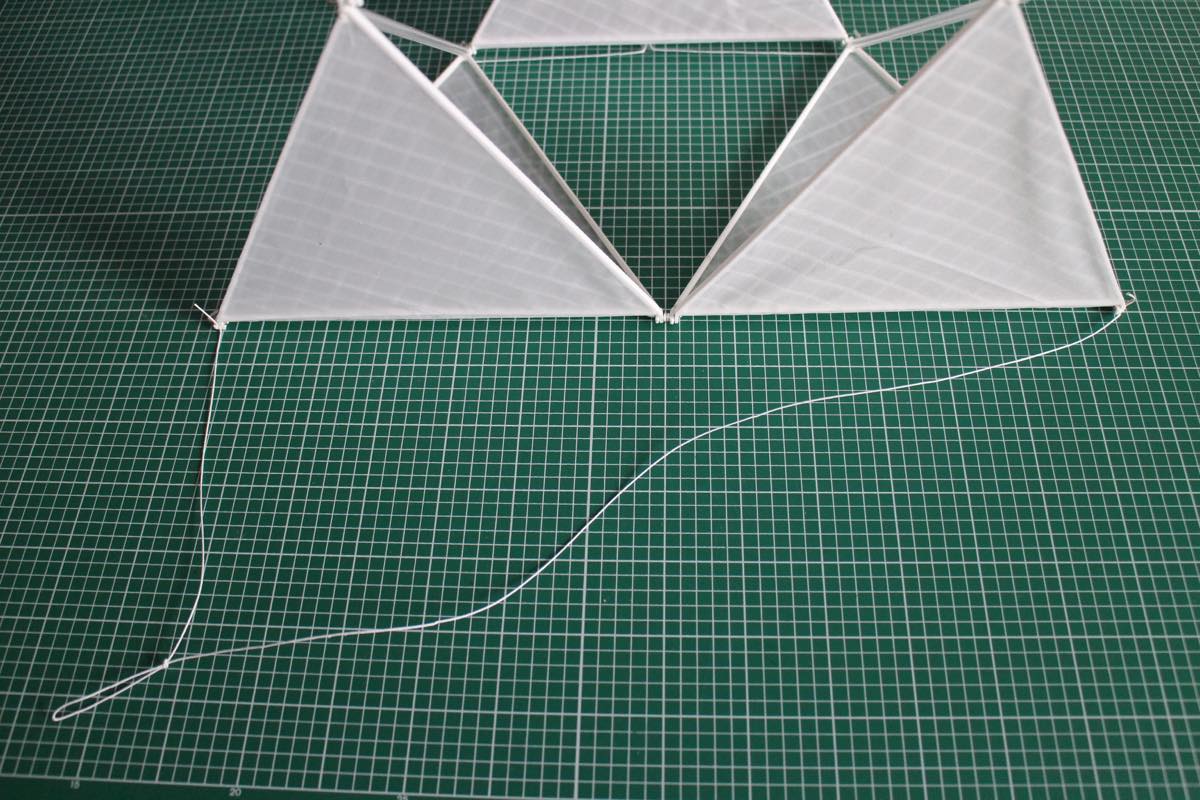
STEP 10
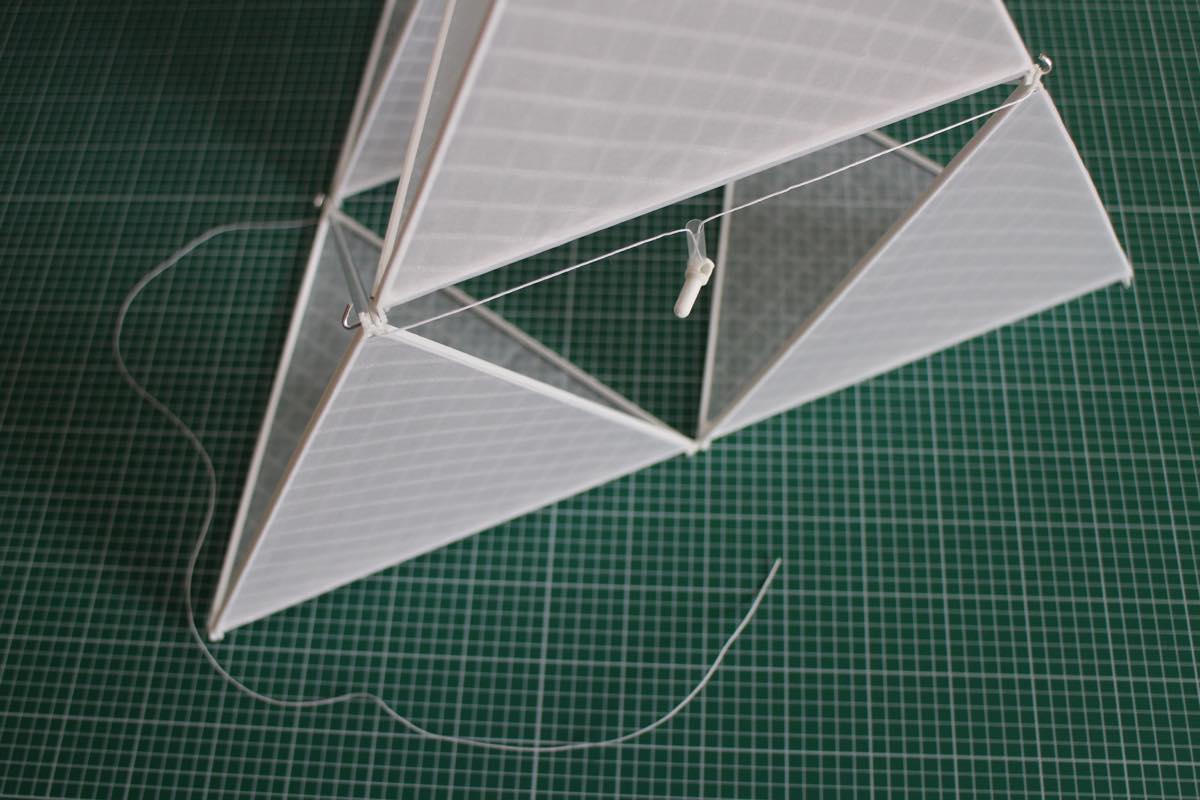
좌우 양쪽의 셀을 관통하도록 실과 빨대를 연결한다.
Connect the thread and straws for the side cells as well.
이번에는 플러그를 통과시킨 후 더 이상 관통시킬 구멍이 없으므로 실을 플러그에 묶어 마무리한다.
This time there are no more holes to go through after a plug, so the other end should be tied at the plug.
이제 플러그를 당겨 구조를 입체로 접고 플러그를 홀더에 끼워 실을 고정시킬 수 있다.
Now you can pull the plugs and then push it into the plug holders to fold and hold the structure.
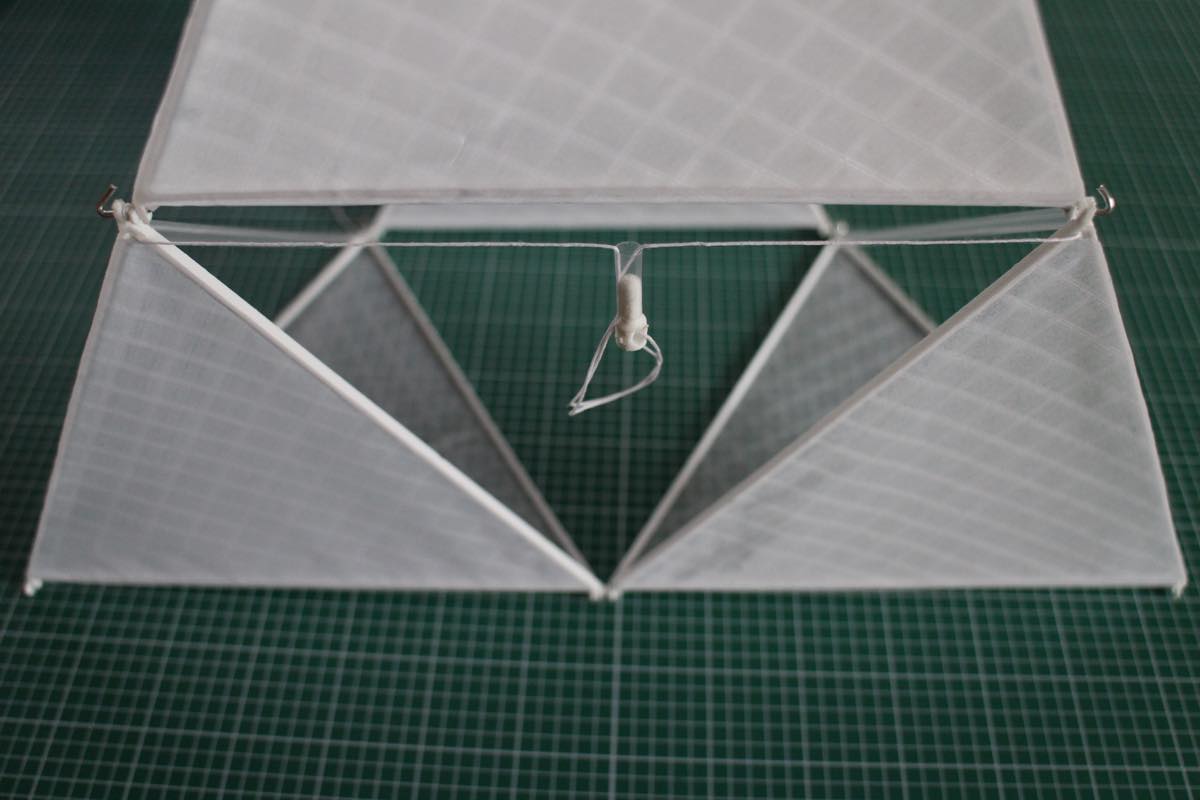
STEP 11
연의 위쪽 끝과 아래쪽 끝에 실을 묶어 연을 당길 고삐줄을 준비한다. 고삐줄의 어느 지점을 당기는 것이 좋은지는 날리면서 조정해 본다.
Tie a loose bridle from the top to the bottom of the kite. You can adjust the pulling point of the bridle when you fly it.
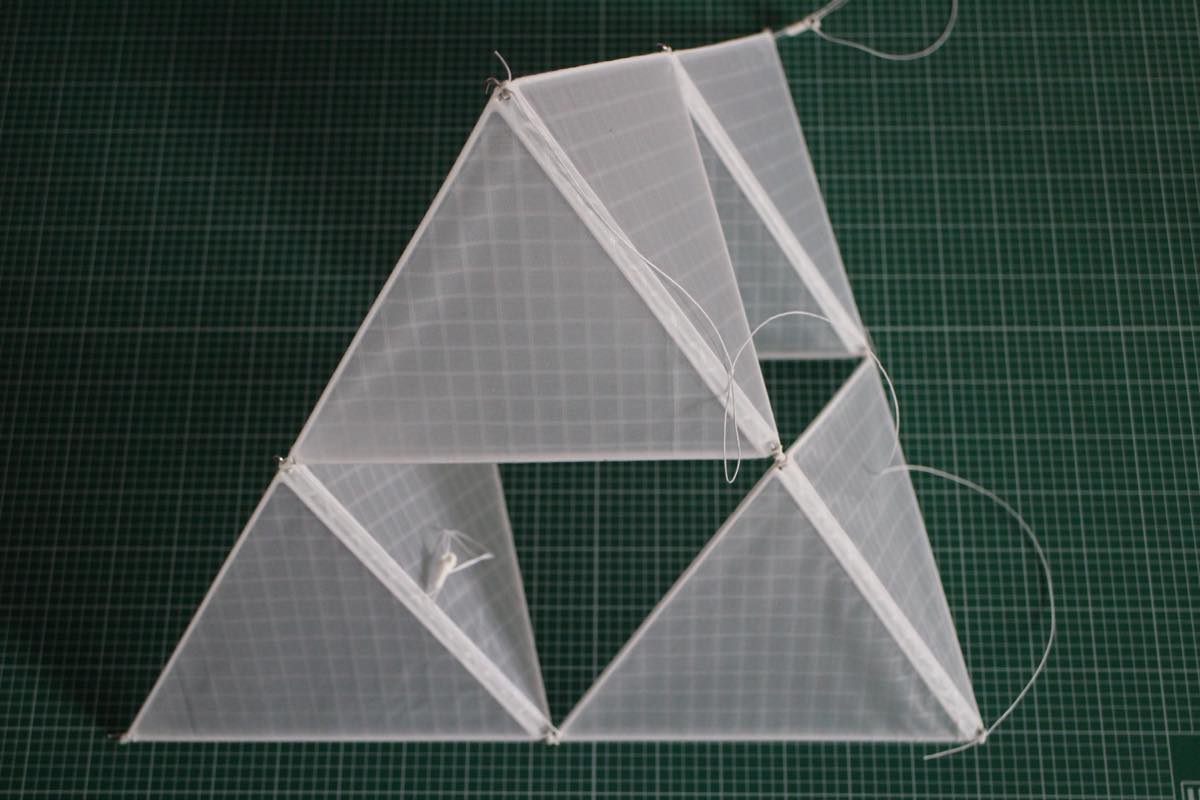
Ready to Fly
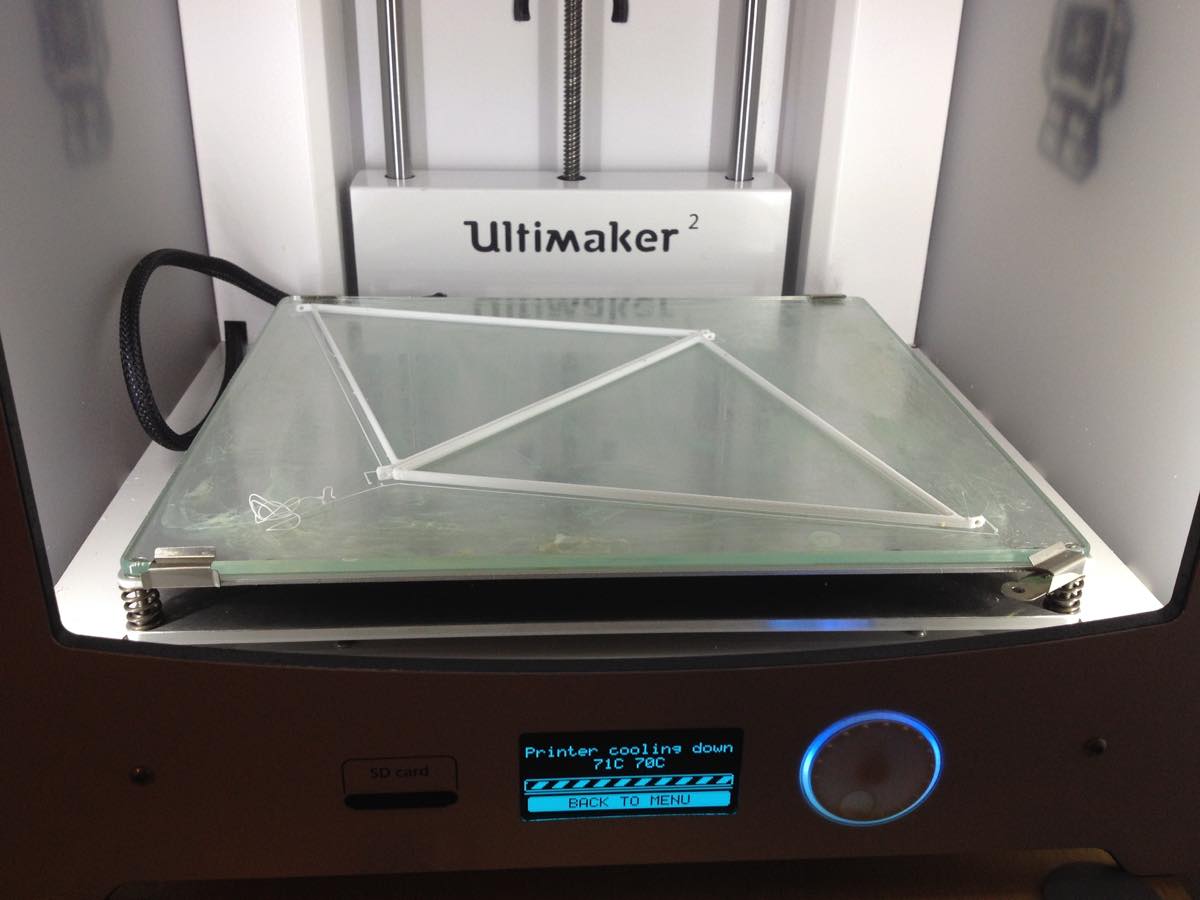
이제 밖으로 나가서 날려본다! 일단 4개의 셀로 이루어진 기본 구조를 만들어 보았다면 사면체의 개수를 확장하고 형태를 변형하여 자신만의 디자인으로 응용하여 만들 수 있다.
Just go outside and enjoy it! Once you make and fly this basic tetrahedral kite, then you can expand this structure and apply for your own kite design.

만약 사면체의 뒤쪽 축으로 사용한 빨대가 강한 바람을 충분히 견디지 못한다면 직경이 조금 더 두꺼운 빨대를 겹쳐서 보강할 수 있다. 그럼 즐거운 연날리기 되시길!
If the rear straw braces are not rigid enough when you fly bigger kite in strong wind, you can reinforce by overlapping them with thicker diameter straws. Good luck!
#OPENKITE
만약 여러분들 버전의 오픈카이트를 만들고 사진이나 영상을 찍어서 SNS에 올리신다면 다른 사람들과 그 경험을 공유할 수 있도록 #openkite 해시태그를 사용해 주세요.
Please use the hashtag #openkite when you post about your versions of OpenKite on the SNS for sharing experience with each other.

Open Kite by Sehun Oh is licensed under a Creative Commons Attribution-NonCommercial-ShareAlike 4.0 International License.